

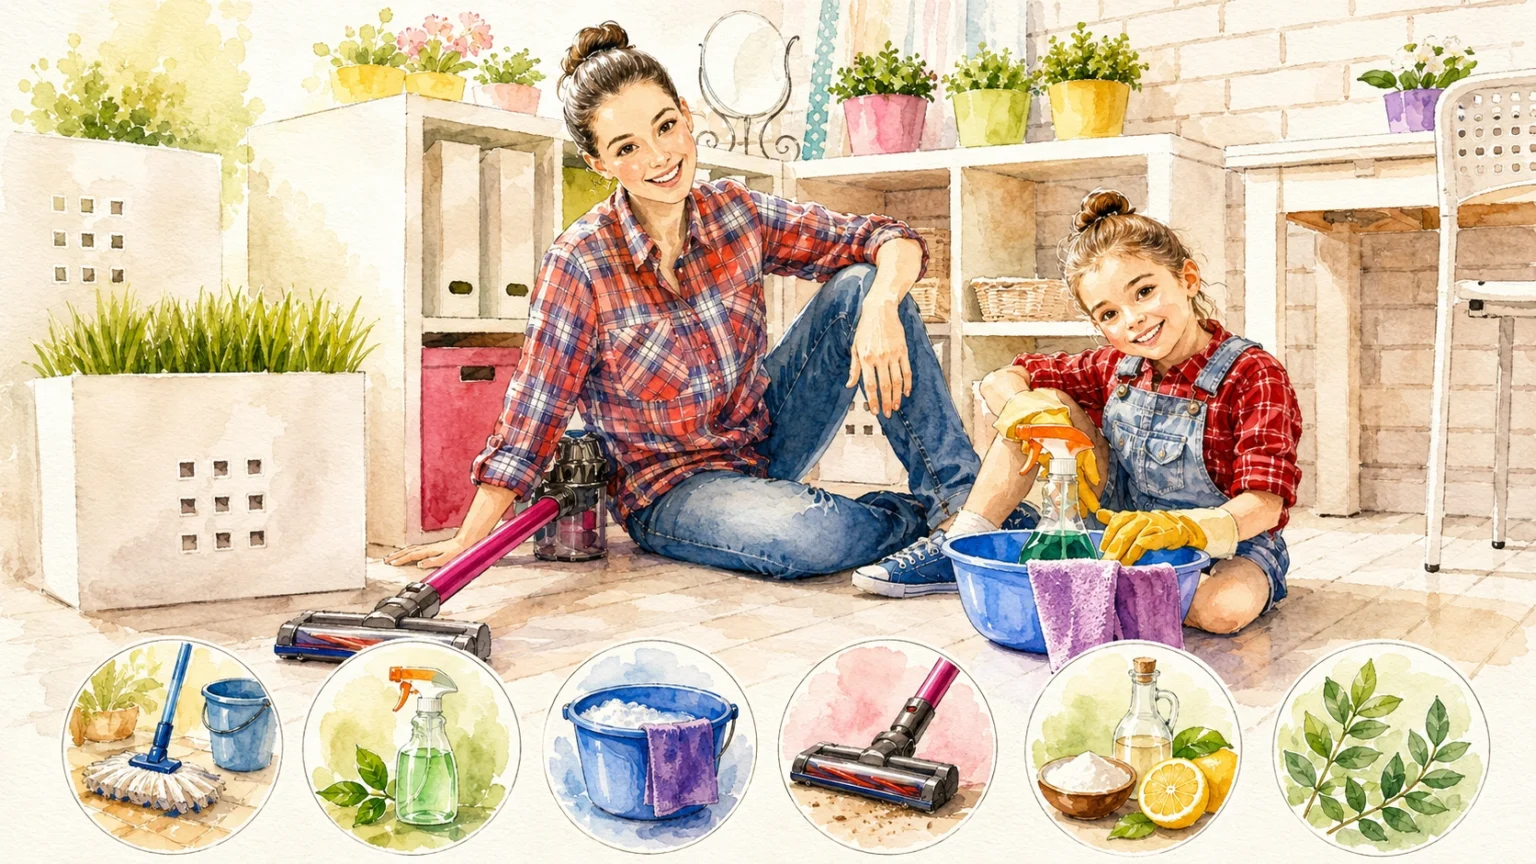
Clean floors can make the whole home feel better. You notice it when you walk into a room and your feet do not feel dust, crumbs, sticky spots, or old mop marks. The room feels lighter, even if nothing else has changed.
The good news is that floor cleaning does not need to be hard. You do not always need strong smells, costly sprays, or a cupboard full of bottles. Most homes can get clean floors with warm water, a mild soap, a simple mop, and the right method.
A DIY floor cleaner can be a smart choice when you want something simple, cheap, and gentle. But it must be used the right way. The same cleaner that works well on tile may not be safe for marble, stone, or some wood floors.
| What this guide helps with | Why it matters |
|---|---|
| Making a simple DIY floor cleaner | Saves money and keeps cleaning easy |
| Choosing the right mix for each floor | Helps avoid damage |
| Cleaning without strong smells | Makes the home feel fresh, not harsh |
| Avoiding common floor mistakes | Protects shine, seal, and surface |
| Learning better mop habits | Floors dry cleaner and faster |
| Keeping floors clean longer | Less deep cleaning later |
Why Natural Floor Cleaning Works Best When It Stays Simple
Many people think a strong smell means a strong clean. That is not always true. A floor can smell like lemons or flowers and still be dirty if dust, grease, and soap film are left behind.
The best floor cleaning is usually simple. You loosen dirt, lift it away, rinse if needed, and let the floor dry without leaving a sticky layer. That is the part many people miss.
A natural floor cleaner works well when it is mild and matched to the floor. The aim is not to make a powerful mix. The aim is to make a safe mix that removes everyday dirt without harming the surface.
| Simple cleaning idea | What it means |
|---|---|
| Less product | Less sticky film on the floor |
| Warm water | Helps loosen dirt better than cold water |
| Mild soap | Removes light grease and daily mess |
| Good mop | Lifts dirt instead of spreading it |
| Small sections | Stops dirty water from drying on the floor |
| Fast drying | Helps prevent streaks and swelling |
What “Natural” Should Mean In Real Cleaning
Natural should not mean risky. Some homemade cleaning ideas online use too many things at once. That can be wasteful, messy, and sometimes unsafe.
For floors, natural should mean gentle, clear, and easy to rinse. It should also mean safe for the floor type. Vinegar may be natural, but it is not safe for every floor.
- Use simple ingredients.
- Avoid mixing many cleaning products.
- Test first in a hidden spot.
- Use only a small amount of soap.
- Keep water light on wood and laminate.
- Dry the floor instead of leaving puddles.
| Good natural cleaning | Poor natural cleaning |
|---|---|
| Mild and controlled | Too much product |
| Safe for the floor | Same mix used everywhere |
| Easy to rinse | Leaves sticky marks |
| Little smell | Strong scent hiding dirt |
| Tested first | Used without checking |
| Dries quickly | Leaves wet patches |
The Best Basic DIY Floor Cleaner For Everyday Use

For many sealed floors, a mild soap and warm water mix is the safest starting point. It cleans dust, food marks, shoe dirt, and light grease without being too strong.
This mix is useful because it does not depend on strong acid. That makes it safer for many modern floors than vinegar-heavy cleaners. Still, you should always check your floor type first.
A cleaner’s rule I trust is this: “The floor should look clean after drying, not feel like something was left on it.”
| Basic DIY cleaner | Amount |
|---|---|
| Warm water | One bucket |
| Mild dish soap or gentle liquid soap | A few drops |
| Optional white vinegar | Only for safe floors like many tiles or vinyl |
| Clean mop | Damp, not soaking wet |
| Dry cloth | For spots, edges, and quick drying |
How To Mix The Basic Cleaner
Use warm water, not boiling water. Very hot water can damage some floor finishes, loosen glue, or make some surfaces look dull over time.
Add only a few drops of mild soap. If you see lots of bubbles, you probably used too much. Floors do not need foam to become clean.
- Fill a bucket with warm water.
- Add a few drops of mild liquid soap.
- Stir gently with the mop.
- Wring the mop very well.
- Mop a small area.
- Rinse the mop often.
- Change the water when it turns grey.
| If the floor looks like this | What to do |
|---|---|
| Streaky after drying | Use less soap next time |
| Sticky under feet | Rinse with clean water |
| Still dusty | Sweep better before mopping |
| Wet for too long | Wring the mop more |
| Dull after cleaning | Check if the cleaner is too strong |
When To Add Vinegar
White vinegar can help cut light grease and old smells on some floors. It works well on many ceramic tiles and some vinyl floors. But it is not safe for every surface.
Do not use vinegar on natural stone, marble, limestone, travertine, or unsealed wood. Acid can slowly etch, dull, or damage those materials.
- Use vinegar only when the floor type allows it.
- Keep the mix weak.
- Do not use it every day if plain soap water works.
- Do not mix vinegar with bleach or other cleaners.
- Keep the room aired while cleaning.
- Rinse if the floor feels tacky.
| Vinegar may be okay for | Avoid vinegar on |
|---|---|
| Many ceramic tiles | Marble |
| Many porcelain tiles | Limestone |
| Some vinyl floors | Travertine |
| Some sealed non-stone surfaces | Natural stone |
| Greasy kitchen tile | Unsealed wood |
| Light odor areas | Waxed floors |
Know Your Floor Before You Clean It
The biggest mistake in floor cleaning is using one cleaner for every floor. Floors may look similar, but they are not made the same way. A floor can be tile, vinyl, laminate, sealed wood, stone, concrete, or something else.
Each surface has different needs. Some floors hate too much water. Some hate acid. Some hate rough scrubbing. Some get cloudy when too much soap is used.
Before using any DIY floor cleaner, learn what your floor can handle. If you do not know, start with the gentlest method: dry dusting, then a damp mop with plain warm water.
| Floor type | Safer cleaning habit |
|---|---|
| Tile | Sweep well, mop with mild cleaner |
| Vinyl | Damp mop, avoid harsh scrubbing |
| Laminate | Use very little water |
| Sealed hardwood | Damp cloth or mop, dry quickly |
| Stone | Use pH-neutral cleaner |
| Concrete | Sweep grit first, then damp mop |
| Waxed floors | Avoid vinegar and strong soap |
A Quick Test Before Full Mopping
Testing first is boring, but it saves floors. Pick a hidden corner or a spot behind furniture. Use a small amount of cleaner, let it dry, then check how it looks.
If the area becomes dull, sticky, cloudy, or rough, stop. Use a milder cleaner or plain water. If the spot looks normal, you can clean more of the floor.
- Test in a hidden area.
- Use a small amount.
- Let it dry fully.
- Check the shine and color.
- Touch it with clean fingers.
- Stop if it feels sticky or rough.
| Test result | Meaning |
|---|---|
| Looks the same | Cleaner may be safe |
| Looks dull | Cleaner may be too strong |
| Feels sticky | Too much soap or residue |
| Feels rough | Surface may be reacting |
| Color changes | Stop using that cleaner |
| Water mark appears | Floor may not like moisture |
DIY Cleaner For Tile Floors
Tile floors are often the easiest to clean. Ceramic and porcelain tile can usually handle a mild DIY cleaner well. The main problem with tile is not the tile itself. It is usually the grout.
Grout holds dirt because it has tiny pores. If dirty mop water sits in grout lines, the floor can look old even after mopping. This is why sweeping and clean water matter so much.
For tile, warm water with a small amount of mild soap is often enough. For kitchen tile, a little vinegar may help if the tile is safe for it.
| Tile cleaning need | Best simple fix |
|---|---|
| Dust and crumbs | Sweep or vacuum first |
| Light grease | Warm water and mild soap |
| Sticky spots | Damp cloth with soap mix |
| Dirty grout | Soft brush and baking soda paste |
| Mop marks | Rinse with clean water |
| Bad smell | Change mop water often |
Simple Tile Floor Cleaner
This tile cleaner is good for everyday cleaning. It works best when the floor has already been swept.
Use a damp mop, not a wet mop. Too much water can settle into grout lines and leave dirt behind.
- Warm water.
- A few drops of mild dish soap.
- Optional small splash of white vinegar if the tile is safe.
- Microfiber mop.
- Soft cloth for corners.
| Ingredient | Job |
|---|---|
| Warm water | Loosens dirt |
| Mild soap | Breaks light grease |
| Vinegar if safe | Helps with light odor and film |
| Microfiber mop | Picks up dirt well |
| Dry cloth | Helps with edges and spots |
How To Clean Grout Without Harsh Products
Grout often needs a little extra work. Do not attack it with a hard metal brush. That can scratch tile and damage grout.
A simple baking soda paste can help with dirty grout. Mix baking soda with a little water until it forms a soft paste. Rub gently with a soft brush, then wipe well with clean water.
- Use a soft brush.
- Work in small lines.
- Do not scrub too hard.
- Wipe away all paste.
- Rinse with clean water.
- Dry the area after cleaning.
| Grout problem | Gentle answer |
|---|---|
| Grey lines | Baking soda paste and soft brush |
| Sticky kitchen dirt | Mild soap first |
| Old soap film | Clean water rinse |
| Wet smell | Dry better after mopping |
| Dark edges | Clean corners by hand |
| Rough grout | Avoid hard scrubbing |
DIY Cleaner For Vinyl Floors
Vinyl floors are common because they are easy to care for and often handle daily life well. They can still be damaged by too much water, strong cleaners, rough pads, or waxy products.
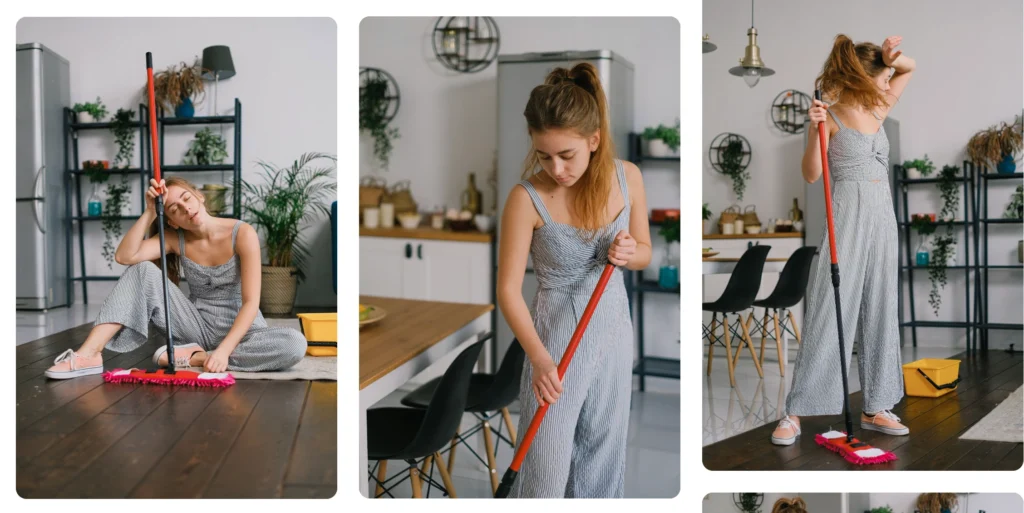
The best vinyl floor cleaner is mild. A few drops of soap in warm water usually does the job. If the floor has greasy kitchen marks, a small amount of vinegar may help, but keep it weak.
Vinyl can look dull if cleaner builds up. If that happens, plain warm water and a clean mop can help remove old film.
| Vinyl floor issue | What helps |
|---|---|
| Dust | Dry mop first |
| Light dirt | Warm water and mild soap |
| Grease | Weak vinegar mix if safe |
| Sticky feel | Rinse with clean water |
| Dull look | Use less soap |
| Scuffs | Soft cloth and gentle rubbing |
Safe Vinyl Cleaning Mix
A safe vinyl mix should feel almost like water. If the bucket looks very foamy, pour some out and add more water.
The mop should be damp enough to clean, but not so wet that water runs into edges or seams. Water that sits near seams can cause problems over time.
- Use warm water.
- Add a few drops of mild soap.
- Wring the mop well.
- Mop in small areas.
- Rinse mop often.
- Dry wet edges with a cloth.
| Good sign | Bad sign |
|---|---|
| Floor dries fast | Water sits in seams |
| No sticky feel | Feet stick after drying |
| Light clean smell | Strong chemical smell |
| No streaks | Cloudy marks |
| Smooth finish | Dull film |
What Not To Use On Vinyl
Vinyl does not need rough treatment. Strong powders, scratchy pads, and heavy wax can make it look worse. A clean mop and mild cleaner are usually better.
Also avoid pouring cleaner straight onto the floor. Mix it in a bucket first so it spreads evenly.
- Do not use steel wool.
- Do not flood the floor.
- Do not use strong bleach mixes.
- Do not use wax unless the maker says so.
- Do not use too much soap.
- Do not scrub printed patterns hard.
| Avoid | Reason |
|---|---|
| Too much water | Can reach seams |
| Rough pads | Can scratch surface |
| Heavy wax | Can build up |
| Strong cleaners | Can dull finish |
| Direct pouring | Can leave patches |
| Too much soap | Causes sticky film |
DIY Cleaner For Laminate Floors
Laminate floors need careful cleaning because they do not like too much water. The top layer may look strong, but moisture can enter edges and seams. This can cause swelling, lifting, or bubbling.
For laminate, less water is better. A microfiber mop that is barely damp is usually the safest choice. You are wiping the floor, not washing it like outdoor concrete.
Do not let puddles sit on laminate. Clean spills quickly. Dry the floor as you go if needed.
| Laminate cleaning rule | Why it matters |
|---|---|
| Use little water | Helps stop swelling |
| Wring mop well | Keeps seams safer |
| Clean spills fast | Prevents moisture damage |
| Avoid steam mops | Heat and moisture can harm |
| Use mild cleaner | Protects top layer |
| Dry after mopping | Reduces water marks |
Gentle Laminate Cleaner
For laminate, warm water with a tiny amount of mild soap can work. Some people use vinegar mixes, but many laminate floors are safer with very mild soap and water only.
Always check care instructions if you have them. If not, use the mildest method first.
- Sweep or vacuum with a hard-floor setting.
- Use warm water.
- Add only one or two drops of mild soap.
- Wring mop until almost dry.
- Mop in small areas.
- Dry with a clean cloth if needed.
| If this happens | Try this |
|---|---|
| Streaks appear | Use less soap |
| Floor feels damp long | Wring mop more |
| Edges look raised | Stop wet mopping and dry |
| Dust remains | Dry clean better first |
| Footprints show | Use clean water rinse with barely damp mop |
Why Steam Is Risky On Laminate
Steam can look like a clean idea because it uses heat. But heat plus moisture can be hard on laminate. It may push moisture into seams.
Some floors may claim steam is safe, but many are not made for it. If you are unsure, skip steam and use a damp microfiber mop.
- Steam can enter seams.
- Heat may affect glue or layers.
- Moisture can cause swelling.
- Damage may show later, not at once.
- A simple damp mop is safer.
- Dry cleaning often reduces the need for steam.
| Steam risk | Better habit |
|---|---|
| Seams swell | Use barely damp mop |
| Finish turns dull | Use mild cleaner |
| Water sits too long | Dry quickly |
| Heat stress | Clean at room temperature |
| Hidden damage | Follow floor care notes |
DIY Cleaner For Sealed Hardwood Floors
Wood floors need respect. Even sealed hardwood does not like being soaked. Water can enter cracks, edges, and worn spots. This can cause dullness, swelling, or dark marks.
A safe DIY cleaner for sealed hardwood should be mild and used lightly. Think damp cloth, not wet mop. The floor should dry fast.
Do not use vinegar often on hardwood unless the floor maker says it is safe. Vinegar is acidic and can dull some finishes over time.
| Hardwood need | Best habit |
|---|---|
| Dust removal | Dry microfiber mop |
| Light cleaning | Barely damp mop |
| Spills | Wipe right away |
| Shine protection | Avoid strong acid |
| Scratch prevention | Remove grit first |
| Water safety | Dry quickly |
Mild Wood Floor Cleaning Mix
For sealed wood, plain warm water may be enough for regular cleaning. If the floor has light grime, use a tiny amount of gentle soap.
The mop must be wrung out very well. If you can see wet lines sitting on the floor, the mop is too wet.
- Dust first with a dry mop.
- Use warm water.
- Add a very small amount of mild soap if needed.
- Wring mop until barely damp.
- Clean small sections.
- Dry with a soft cloth.
| Good wood cleaning | Risky wood cleaning |
|---|---|
| Barely damp mop | Wet mop |
| Small soap amount | Foamy bucket |
| Dry after spots | Letting water sit |
| Soft cloth | Rough scrub pad |
| Quick spill wipe | Waiting until later |
| Gentle routine | Strong acid use |
Signs Your Wood Floor Needs Extra Care
Sometimes the problem is not dirt. The finish may be worn. If wood looks grey, rough, or water leaves dark spots, it may need more than cleaning.
Cleaning cannot fix damaged finish. In that case, strong scrubbing may make things worse.
- Water soaks in instead of sitting on top.
- The floor looks grey in busy areas.
- The surface feels rough.
- Dark spots appear after spills.
- The shine is uneven.
- Scratches catch dirt easily.
| Sign | What it may mean |
|---|---|
| Rough feel | Finish may be worn |
| Dark water mark | Moisture may be entering wood |
| Dull traffic lane | Finish may need care |
| Sticky patches | Old product buildup |
| Grey edges | Dirt or wear in cracks |
| Uneven shine | Mixed products or worn finish |
DIY Cleaner For Stone Floors
Stone floors can be beautiful, but they need gentle care. Marble, limestone, travertine, and other natural stones can react badly to vinegar, lemon, and other acidic cleaners.
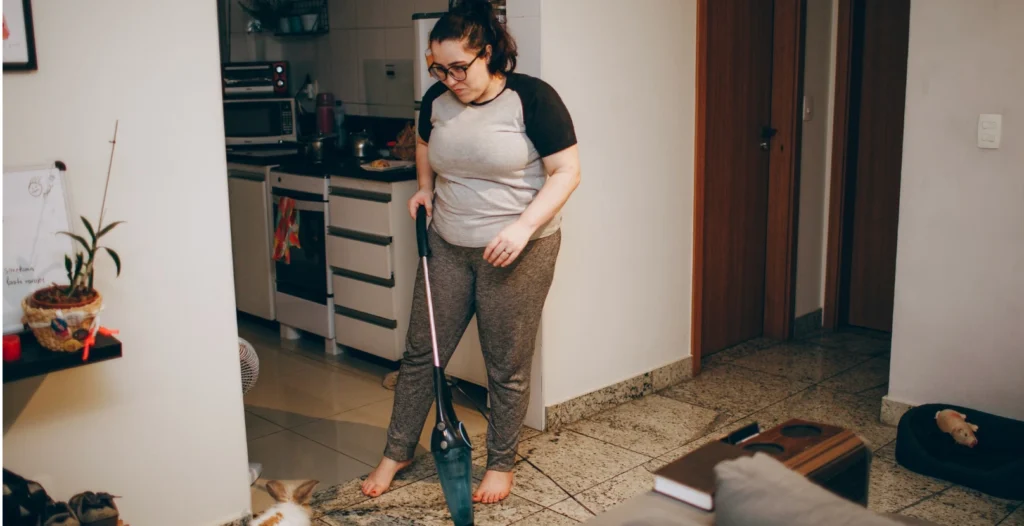
For stone, the safest choice is a pH-neutral cleaner made for stone. If you want a simple home method, use warm water and a tiny amount of very mild soap, then rinse well. But do not use acid.
Stone can stain or etch if cleaned wrongly. Etching looks like dull marks, not dirt. Once etching happens, normal mopping will not remove it.
| Stone floor rule | Why it matters |
|---|---|
| Avoid vinegar | Acid can dull stone |
| Avoid lemon | Acid can etch |
| Use pH-neutral cleaner | Safer for stone |
| Dry spills quickly | Helps prevent stains |
| Rinse soap well | Stops cloudy film |
| Use soft mop | Avoid scratches |
Simple Stone-Safe Cleaning
If you are not sure what stone you have, treat it carefully. Use plain warm water first. If needed, use a tiny drop of mild soap and rinse with clean water.
Do not leave water sitting on stone. Some stone is porous and can absorb moisture or stains.
- Sweep soft grit first.
- Use warm water.
- Add a tiny drop of mild soap if needed.
- Mop gently.
- Rinse with clean water.
- Dry with a soft towel.
| Stone cleaning problem | Gentle fix |
|---|---|
| Cloudy film | Rinse with clean water |
| Dull marks | Stop acidic cleaners |
| Dirty grout | Use soft brush |
| Water spots | Dry after mopping |
| Stains | Blot fast, do not scrub hard |
| Grit scratches | Sweep more often |
Why Vinegar Is Not A Stone Cleaner
Vinegar is often praised as a natural cleaner, but it is not right for stone. Its acid can slowly damage the surface. The stone may lose shine and look cloudy.
This is one place where “natural” can still be harmful. A cleaner should fit the floor, not just sound healthy.
- Vinegar can etch marble.
- Lemon can damage stone too.
- Acid damage may not show at first.
- Dull marks can become permanent.
- Stone needs neutral cleaning.
- Test before using anything new.
| Acidic cleaner | Stone-safe choice |
|---|---|
| Vinegar | pH-neutral stone cleaner |
| Lemon juice | Warm water |
| Strong bathroom spray | Stone-safe product |
| Harsh powder | Soft cloth |
| Heavy soap | Light cleaner and rinse |
The Best Mop Matters More Than The Cleaner
A good DIY floor cleaner can fail if the mop is dirty. Many floors are not cleaned badly because the cleaner is wrong. They are cleaned badly because dirty mop water is being spread around.
A microfiber mop is a strong choice for many homes. It catches dust and dirt well. It also works with less water, which is better for many floors.
Old string mops can work, but they need more rinsing. Sponge mops can push dirty water around if not cleaned well. Whatever mop you use, keep it clean.
| Mop type | Best use |
|---|---|
| Microfiber flat mop | Daily cleaning and low water use |
| String mop | Tile and larger wet-safe areas |
| Spray mop | Quick light cleaning |
| Sponge mop | Smooth floors, but rinse often |
| Dust mop | Dry dust and hair removal |
| Cloth by hand | Corners and sticky spots |
How To Keep A Mop From Smelling
A smelly mop can make the whole floor smell bad. If the mop head stays wet and dirty, it grows odor. Then every cleaning spreads that smell.
After mopping, rinse the mop well and let it dry fully. Do not leave it sitting in dirty water.
- Rinse after use.
- Wash removable pads.
- Dry mop heads fully.
- Do not store damp mop in a closed bucket.
- Replace old mop heads.
- Use separate pads for bathrooms if possible.
| Mop smell cause | Fix |
|---|---|
| Left in dirty bucket | Rinse and air dry |
| Too much soap | Wash pad well |
| Old food dirt | Replace mop head |
| Bathroom germs | Use separate mop pad |
| No drying air | Hang it open |
| Dirty bucket | Wash bucket too |
Why Two Buckets Can Clean Better
A two-bucket method sounds simple because it is simple. One bucket holds cleaning water. The other holds rinse water. This keeps dirt out of your cleaner for longer.
If you use one bucket only, the water gets dirty fast. Then you mop with grey water and wonder why the floor looks dull.
- Use one bucket for cleaner.
- Use one bucket for rinsing.
- Wring the mop before returning to cleaner.
- Change rinse water when dirty.
- Keep cleaner water as clean as possible.
- Use this method for larger rooms.
| One-bucket problem | Two-bucket benefit |
|---|---|
| Cleaner gets dirty fast | Cleaner stays useful longer |
| Dirt spreads | Dirt gets rinsed away |
| Floor dries dull | Floor looks cleaner |
| More streaks | Fewer streaks |
| Bad smell | Fresher result |
The Right Way To Mop Any Floor
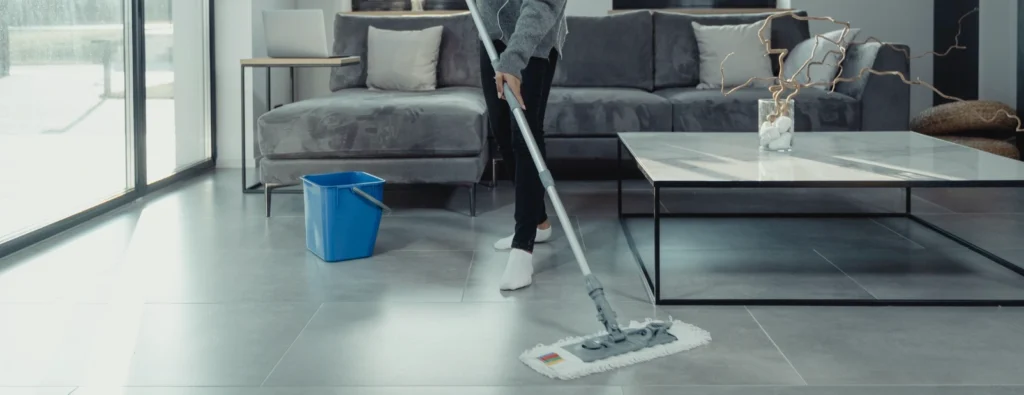
Mopping looks easy, but the order matters. If you mop before removing crumbs and grit, the mop turns dry dirt into muddy streaks. That makes the floor harder to clean.
Start dry, then go damp. Sweep, vacuum, or dust mop first. Then spot clean sticky areas. After that, mop the full floor.
Work from the far side of the room toward the exit. This stops you from walking over the wet floor.
| Mopping step | Why it helps |
|---|---|
| Dry clean first | Removes grit and crumbs |
| Spot clean stains | Stops spreading sticky mess |
| Mop small areas | Keeps water controlled |
| Rinse often | Removes dirt from mop |
| Change water | Stops grey film |
| Dry if needed | Prevents streaks and damage |
How Damp Should The Mop Be?
The mop should be damp enough to clean, but not dripping. A wet mop is only safe on floors that can handle water well, such as some tiles. Even then, too much water can dirty grout.
For wood, laminate, and many modern floors, damp means almost dry. If water pools or runs, the mop is too wet.
- Damp mop for most floors.
- Wet mop only on safe tile areas.
- Wring until no water drips.
- Dry corners if water gathers.
- Use less water near seams.
- Let air move through the room.
| Mop condition | Best for |
|---|---|
| Barely damp | Wood, laminate, quick dust cleaning |
| Damp | Vinyl, sealed floors, regular cleaning |
| Wetter mop | Some tile floors only |
| Dripping mop | Usually too wet |
| Dry mop | Dust, hair, grit |
How To Avoid Streaks
Streaks usually come from dirty water, too much soap, or a mop that is not clean. They can also happen when the floor dries slowly.
Use less cleaner than you think you need. Change the water early. Rinse if the floor looks cloudy.
- Use a clean mop pad.
- Use less soap.
- Change water when grey.
- Mop with clean strokes.
- Do not leave puddles.
- Rinse with plain water if needed.
| Streak cause | Fix |
|---|---|
| Too much soap | Use fewer drops |
| Dirty mop | Wash or change pad |
| Dirty water | Change bucket |
| Slow drying | Open window or fan |
| Old product buildup | Rinse with clean water |
| Uneven mopping | Work in small sections |
Easy DIY Cleaner Recipes By Floor Type
A DIY floor cleaner should never be one-size-fits-all. The safest cleaner depends on the floor surface. If you do not know the floor type, use plain warm water first.
These mixes are for common daily dirt. They are not for serious mold, sewage, strong chemicals, or major damage. Those problems need proper help and safe handling.
Always label any homemade cleaner. Keep it away from small children and pets. Do not mix it with other products.
| Floor type | Simple DIY cleaner |
|---|---|
| Ceramic tile | Warm water, a few drops mild soap |
| Porcelain tile | Warm water, mild soap, optional weak vinegar if safe |
| Vinyl | Warm water and mild soap |
| Laminate | Barely damp mop with warm water |
| Sealed hardwood | Barely damp mop, tiny soap if needed |
| Natural stone | Warm water or stone-safe neutral cleaner |
| Concrete | Warm water and mild soap |
Gentle Everyday Floor Cleaner
This is the safest first mix for many sealed floors. It is mild and easy to make.
Use it when the floor needs normal cleaning, not heavy stain removal.
- Warm water.
- A few drops of mild dish soap.
- Clean microfiber mop.
- Dry cloth for edges.
- Clean water rinse if needed.
| Best for | Not ideal for |
|---|---|
| Light dirt | Heavy grease |
| Dusty floors | Raw wood |
| Vinyl if used lightly | Natural stone if soap is not rinsed |
| Tile | Floors needing special care |
| Sealed surfaces | Unknown delicate floors without testing |
Vinegar Tile And Vinyl Mix
Use this only on floors that can handle vinegar. Keep it weak. More vinegar does not mean better cleaning.
This mix can help with light kitchen grease and old smell on safe floors.
- Warm water.
- Small splash of white vinegar.
- Few drops mild soap if needed.
- Damp mop.
- Clean rinse if the floor feels sticky.
| Use with care on | Do not use on |
|---|---|
| Some tile | Marble |
| Some vinyl | Limestone |
| Greasy safe floors | Travertine |
| Light odor areas | Hardwood unless approved |
| Non-stone sealed floors | Waxed floors |
Baking Soda Spot Paste
Baking soda is better for spots than for full-floor mopping. It can leave powdery residue if spread everywhere.
Use it on small sticky spots, grout lines, or scuffs where the floor can handle gentle rubbing.
- Baking soda.
- A little water.
- Soft cloth or soft brush.
- Clean water for wiping.
- Dry cloth for drying.
| Good for | Avoid using on |
|---|---|
| Small sticky spots | Glossy floors that scratch easily |
| Some grout | Delicate stone without testing |
| Light scuffs | Waxed floors |
| Dried food marks | Large whole-floor cleaning |
| Corners | Rough scrubbing |
Natural Does Not Mean Mix Everything Together
One of the worst DIY cleaning mistakes is mixing many products. People may mix vinegar, bleach, soap, baking soda, ammonia, or other cleaners because they think more ingredients mean more power.
That is not safe or smart. Some mixtures can create harmful fumes. Others cancel each other out and leave a messy paste. Floors need simple cleaning, not chemistry guessing.
Never mix bleach with vinegar, ammonia, or other cleaning products. Keep homemade cleaners mild and separate.
| Unsafe or poor habit | Safer habit |
|---|---|
| Mixing many products | Use one mild cleaner |
| Adding bleach to vinegar | Never mix bleach with acids |
| Using strong smells | Use fresh air and clean water |
| Making big batches | Make small fresh amounts |
| Using unlabeled bottles | Label clearly |
| Copying random recipes | Check floor safety first |
Why More Ingredients Can Make Floors Dirtier
Too many ingredients can leave film. Film catches dust. Then the floor looks dirty faster. This is why some people mop often but still feel sticky floors under their feet.
Good floor cleaning removes dirt and leaves little behind. That is the goal.
- Too much soap leaves residue.
- Oils can make floors slippery.
- Baking soda can leave powder.
- Vinegar can harm some floors.
- Strong scents can hide bad cleaning.
- Dirty rinse water spreads grime.
| Ingredient problem | Floor result |
|---|---|
| Too much soap | Sticky feel |
| Oil added to cleaner | Slip risk |
| Baking soda not rinsed | White film |
| Vinegar on stone | Dull marks |
| Heavy scent | Smell without clean |
| Dirty water | Grey streaks |
How Often Should You Clean Floors Naturally?
How often you clean depends on your home. A house with children, pets, cooking, and outdoor shoes needs more floor care than a quiet home with few people.
Daily cleaning does not always mean daily mopping. Often, dry cleaning is enough. Sweeping and dust mopping reduce the dirt that later becomes sticky when wet.
Wet mopping should happen when the floor needs it. Too much wet mopping can be bad for some floors.
| Home situation | Floor care habit |
|---|---|
| Busy kitchen | Sweep daily, mop when sticky |
| Entryway | Dry clean often |
| Bedroom | Dust mop weekly |
| Bathroom | Clean more often |
| Pet home | Remove hair often |
| Wood floors | Damp mop only as needed |
A Simple Weekly Floor Routine
A routine helps keep floors clean without making cleaning feel endless. Small habits are easier than waiting until the floor is very dirty.
The best routine is the one you can actually keep. Do not make it too hard.
- Dry mop busy areas most days.
- Clean spills right away.
- Mop kitchen when sticky.
- Mop bathroom often.
- Wash mop pads weekly.
- Deep clean corners when dust builds.
| Area | Simple routine |
|---|---|
| Kitchen | Sweep often, mop as needed |
| Living room | Dust mop and spot clean |
| Bedroom | Weekly dust mop |
| Bathroom | Damp clean often |
| Hallway | Remove shoe dirt |
| Under furniture | Clean when dust gathers |
Signs Your Floor Needs Mopping
You do not need to guess. Floors show when they need mopping. The trick is to notice early, before dirt spreads everywhere.
If your socks look dirty after walking, the floor needs cleaning. If your shoes leave marks, clean the entryway.
- Sticky spots.
- Dull walking paths.
- Dust along edges.
- Food crumbs.
- Pet prints.
- Dirty socks.
- Bad smell near the floor.
- Greasy kitchen feel.
| Floor sign | What to do |
|---|---|
| Sticky under feet | Damp mop with mild cleaner |
| Dust balls | Dry mop or vacuum |
| Greasy kitchen patches | Mild soap mix |
| Shoe marks | Spot clean first |
| Dirty grout | Brush gently |
| Dull film | Rinse with clean water |
The Entryway Is Where Clean Floors Begin
Most floor dirt comes from outside. Shoes bring dust, grit, mud, pollen, and tiny stones. If you stop dirt at the door, the whole home becomes easier to clean.
A good mat is not a decoration only. It is a cleaning tool. Use one outside and one inside if possible. This catches more dirt before it reaches the main floor.
Taking shoes off indoors can also make a big difference. It may feel like a small habit, but it saves a lot of cleaning.
| Entryway habit | Floor benefit |
|---|---|
| Use a strong doormat | Catches outdoor dirt |
| Shake mats often | Stops dirt buildup |
| Keep shoes near door | Less grit indoors |
| Wipe pet paws | Fewer prints |
| Sweep entry often | Dirt does not spread |
| Keep a small cloth ready | Quick mud cleanup |
Best Small Entryway Setup
You do not need a fancy entry space. You need a place to stop dirt before it travels.
Even a small corner can work. A mat, a shoe tray, and a cloth can save many hours of floor cleaning over time.
- Outdoor mat for heavy dirt.
- Indoor mat for fine dust.
- Shoe tray for wet shoes.
- Small towel for spills or paws.
- Basket for house slippers.
- Hand broom for quick sweeping.
| Entry item | Job |
|---|---|
| Outdoor mat | Scrapes dirt |
| Indoor mat | Catches fine dust |
| Shoe tray | Holds mud and water |
| Small towel | Wipes wet spots |
| Hand broom | Fast cleanup |
| Slippers | Keeps feet clean indoors |
Kitchen Floors Need A Different Plan
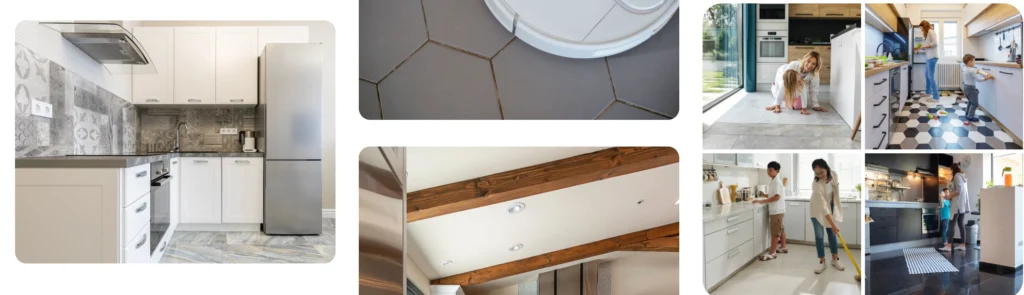
Kitchen floors collect food, oil, crumbs, water drops, and sticky spills. This is why kitchen floors often feel dirty faster than other rooms.
The mistake many people make is mopping greasy floors with plain water only. Water alone may move grease around. A few drops of mild soap help break that light grease.
Clean spills as soon as you see them. Dried food takes more work later and may attract insects.
| Kitchen mess | Best simple action |
|---|---|
| Cooking oil drop | Mild soap and cloth |
| Juice spill | Wipe fast, then damp mop |
| Flour dust | Dry clean before wet mop |
| Sauce spot | Spot clean before full mop |
| Crumbs | Sweep first |
| Greasy path | Warm water and mild soap |
How To Clean A Sticky Kitchen Floor
Sticky floors often come from food spills or too much cleaner. First, find out which one it is. If the whole floor feels sticky after mopping, soap residue may be the cause.
Use clean warm water to rinse. Then use less soap next time.
- Sweep crumbs first.
- Spot clean sticky marks.
- Mop with warm water and mild soap.
- Rinse mop often.
- Use clean water if the floor feels soapy.
- Dry with a cloth if needed.
| Sticky cause | Fix |
|---|---|
| Juice spill | Wipe, then damp mop |
| Grease | Mild soap mix |
| Too much cleaner | Plain water rinse |
| Dirty mop | Wash mop pad |
| Old residue | Clean in small sections |
| Wet floor drying slowly | Use less water |
Bathroom Floors Need Clean Water And Good Drying
Bathroom floors deal with water, soap, hair, and sometimes toilet area mess. A natural cleaner can help, but bathroom floors also need careful hygiene.
Use separate mop pads or cloths for bathroom floors if possible. This keeps bathroom dirt away from the rest of the home.
Do not leave bathroom floors wet for long. Moisture can cause odor and make corners grimy.
| Bathroom floor issue | Helpful habit |
|---|---|
| Hair | Dry sweep first |
| Soap film | Mild cleaner and rinse |
| Water spots | Dry after cleaning |
| Toilet area dirt | Clean separately |
| Corners | Wipe by hand |
| Odor | Wash mop pad after use |
Bathroom DIY Floor Cleaner
For many bathroom tiles, warm water and mild soap works well. If the floor is safe for vinegar, a weak vinegar mix can help with light odor. Do not use vinegar on stone bathroom floors.
The toilet area should be cleaned carefully. Use a separate cloth or mop pad and wash it after.
- Remove hair first.
- Use warm water and mild soap.
- Clean around corners by hand.
- Rinse if needed.
- Dry wet areas.
- Wash cloths after use.
| Bathroom task | Best tool |
|---|---|
| Hair removal | Dry broom or vacuum |
| Tile mopping | Damp mop |
| Corners | Small cloth |
| Toilet base | Separate cloth |
| Grout | Soft brush |
| Drying | Old clean towel |
How To Clean Floors With Pets At Home
Pets bring joy, but they also bring hair, paw prints, food crumbs, and sometimes smells. Natural cleaning can work well in pet homes, but you must be careful with scents.
Some essential oils can bother pets. It is safer to skip strong scents unless you know they are safe for your animal. Clean should smell like clean air, not heavy perfume.
Pet homes need more dry cleaning. Hair and dust should be removed before mopping or they will clump and spread.
| Pet floor problem | Simple fix |
|---|---|
| Hair | Dry mop often |
| Paw prints | Damp cloth near door |
| Food crumbs | Sweep feeding area |
| Water bowl marks | Use mat under bowl |
| Odor | Clean source, not just smell |
| Mud | Wipe paws before entry |
Pet-Safer Floor Cleaning Habits
The best pet-safe habit is to keep floors dry after cleaning. Pets walk on floors, lick paws, and lie down. Do not leave cleaner sitting on the surface.
Use mild mixes and rinse when needed. Keep pets away until floors are dry.
- Avoid strong scents.
- Keep pets away while mopping.
- Let floors dry fully.
- Rinse sticky areas.
- Clean food areas often.
- Wash pet mats.
| Safer habit | Why it helps |
|---|---|
| Mild cleaner | Less residue on paws |
| No heavy scent | Better for sensitive pets |
| Dry floor | Less slipping |
| Clean bowl area | Less odor |
| Paw wiping | Less mud indoors |
| Frequent hair removal | Cleaner air and floor |
How To Clean Floors With Children At Home
Children play, crawl, sit, drop food, run, spill drinks, and bring dirt inside. This means floors need regular care, but the cleaner should stay gentle.
A mild DIY floor cleaner is useful in homes with children because it avoids strong smells. Still, cleaning products should always be stored safely.
Let the floor dry before children run on it. Wet floors can be slippery.
| Child-related mess | Easy answer |
|---|---|
| Crumbs | Sweep after meals |
| Juice spills | Wipe right away |
| Craft mess | Dry clean first |
| Muddy shoes | Shoes off near door |
| Sticky hands | Spot clean play areas |
| Toy marks | Soft cloth rubbing |
Child-Safe Cleaning Routine
Keep the routine simple. Clean food areas after meals. Dry mop play areas often. Damp mop when the floor feels sticky.
Do not use too much soap, because children may sit and play on the floor. Less residue is better.
- Store cleaners high and closed.
- Use mild mixes.
- Dry floors before play.
- Clean spills fast.
- Wash mop pads often.
- Avoid strong scents.
| Cleaning need | Habit |
|---|---|
| After snacks | Sweep crumbs |
| After spills | Wipe quickly |
| Playroom dust | Dry mop |
| Sticky patches | Spot clean |
| Weekly cleaning | Damp mop |
| Safety | Keep bottles away |
Common DIY Floor Cleaning Mistakes
Many floor problems come from good intentions. People want the floor very clean, so they use more cleaner, more water, more scrubbing, and more scent. Sadly, that can make floors worse.
The best cleaner is not always the strongest one. The best method is the one that removes dirt without leaving damage behind.
Small mistakes repeated every week can dull a floor over time. Fixing those habits can make floors look better without buying anything new.
| Mistake | Why it causes trouble |
|---|---|
| Too much soap | Leaves sticky film |
| Too much water | Can damage seams and wood |
| Dirty mop | Spreads grime |
| No sweeping first | Turns dust into mud |
| Vinegar on stone | Can dull or etch |
| Hard scrubbing | Can scratch surfaces |
| Strong scents | Can hide poor cleaning |
| Not drying | Causes streaks and odor |
Using Too Much Cleaner
More cleaner does not always mean more clean. In floor care, more cleaner often means more residue. Residue grabs dust, so the floor gets dirty faster.
If your floor feels sticky after mopping, use less soap next time. Rinse with plain water to remove old film.
- Use only a few drops of soap.
- Avoid thick foam.
- Rinse when needed.
- Change water often.
- Stop adding extra cleaner to dirty water.
- Let the floor dry fully.
| Sign of too much cleaner | What to do |
|---|---|
| Sticky feet | Rinse with plain water |
| Streaks | Use less soap |
| Cloudy shine | Clean with fresh water |
| Dust returns fast | Remove residue |
| Mop feels slimy | Wash mop pad |
Mopping Before Sweeping
Wet mopping over crumbs and dust creates dirty paste. This paste gets pushed into corners and grout lines. Then the floor may look worse after cleaning.
Always dry clean first. It takes only a few minutes and saves effort.
- Sweep under tables.
- Vacuum edges.
- Remove hair.
- Pick up large crumbs.
- Dust mop before wet mop.
- Clean corners by hand if needed.
| Dry dirt left behind | What happens when mopped |
|---|---|
| Dust | Turns into grey film |
| Hair | Clumps on mop |
| Crumbs | Smears across floor |
| Grit | Scratches surface |
| Pet fur | Sticks to edges |
| Soil | Becomes mud |
Letting Dirty Water Do The Work
A bucket can turn grey quickly. Once water is dirty, it stops cleaning well. You are mostly moving dirt from one place to another.
Change the water before it looks awful. Fresh water is one of the cheapest cleaning tools.
- Change water when grey.
- Rinse mop often.
- Use two buckets for big rooms.
- Do not clean the whole home with one bucket.
- Wash the bucket after use.
- Start bathrooms with fresh water, not old water.
| Dirty water sign | Better choice |
|---|---|
| Grey bucket | Change water |
| Bad smell | Wash mop and bucket |
| Floor streaks | Use fresh water |
| Mop feels heavy | Rinse well |
| Dirt floating | Dump and refill |
How To Make Floors Smell Fresh Without Heavy Fragrance
A clean floor should not need a heavy scent. Freshness comes from removing dirt, drying the floor, and cleaning the mop. If you use scent to cover odor, the smell may return quickly.
Many strong scents can bother people with sensitive noses. They can also bother pets. It is often better to keep the room aired and the floor truly clean.
If you like a light scent, use care. Do not add oily ingredients to the mop bucket because they can make floors slippery.
| Fresh floor habit | Why it works |
|---|---|
| Clean spills fast | Stops odor at source |
| Wash mop pads | Removes old smell |
| Dry floors | Reduces musty odor |
| Open windows | Clears stale air |
| Clean mats | Stops entryway smell |
| Use less soap | Less residue |
Natural Freshness Without Slippery Floors
Freshness should be safe. Avoid adding oils that leave a slick layer. A floor that smells nice but becomes slippery is not a good clean.
For most homes, clean water, mild soap, fresh air, and a clean mop are enough.
- Open a window while mopping.
- Dry wet corners.
- Wash rugs and mats.
- Empty bins near floors.
- Clean under pet bowls.
- Keep bathroom floors dry.
| Smell source | Fix |
|---|---|
| Dirty mop | Wash or replace mop head |
| Wet bathroom floor | Dry after use |
| Pet feeding area | Clean mat and floor |
| Kitchen grease | Mild soap cleaning |
| Muddy entry mat | Shake and wash |
| Old spills | Spot clean by hand |
How To Remove Common Floor Marks Naturally
Not every mark needs full mopping. Many marks are better handled by spot cleaning. This saves time and keeps the rest of the floor from getting too wet.
Use the gentlest tool first. A soft cloth is safer than a scrub pad. Warm water is safer than a strong cleaner.
Always check the floor type before using baking soda, vinegar, or rubbing. Some surfaces scratch or dull easily.
| Floor mark | Gentle first step |
|---|---|
| Food spot | Warm damp cloth |
| Shoe mark | Soft cloth and mild soap |
| Grease | Warm water with mild soap |
| Mud | Let dry, sweep, then wipe |
| Water spot | Dry cloth |
| Sticky drink | Damp cloth, then rinse |
Sticky Food And Drink Marks
Sticky marks should be softened first. Do not scrape hard. A warm damp cloth can loosen the mess.
After wiping, clean the area with mild soap water. Then wipe with clean water so it does not stay sticky.
- Place warm damp cloth on the spot.
- Wait a short moment.
- Wipe gently.
- Use mild soap if needed.
- Rinse with clean damp cloth.
- Dry the area.
| Sticky mark | What helps |
|---|---|
| Juice | Clean water rinse |
| Jam | Warm damp cloth |
| Sauce | Mild soap |
| Candy | Patience and gentle wiping |
| Dried food | Soften before rubbing |
Shoe Marks And Scuffs
Shoe marks often look worse than they are. Many can be removed with a soft cloth and mild soap.
Avoid hard scrubbing first. If the floor is delicate, hard rubbing can damage the finish more than the mark did.
- Try a dry microfiber cloth first.
- Use a damp cloth if needed.
- Add mild soap for stubborn marks.
- Rub gently.
- Rinse the spot.
- Dry with a clean cloth.
| Scuff type | Gentle fix |
|---|---|
| Light black mark | Dry microfiber cloth |
| Sticky shoe mark | Mild soap cloth |
| Mud line | Let dry, sweep, wipe |
| Heel mark | Gentle rubbing |
| Unknown mark | Test hidden area first |
How To Keep Floors Clean Longer
The easiest floor to clean is the floor that never gets too dirty. Small habits reduce big cleaning days.
Think of floor care as prevention. Stop dirt at the door, clean spills fast, and dry mop often. Then mopping becomes quick and simple.
A clean floor routine should fit real life. If it is too hard, people stop doing it.
| Prevention habit | Result |
|---|---|
| Shoes off indoors | Less grit |
| Mats at doors | Less dirt spread |
| Quick spill wipe | Fewer sticky spots |
| Dry mop often | Less wet cleaning |
| Pet paw towel | Fewer prints |
| Clean mop storage | Better smell |
Daily Habits That Save Work
You do not need to mop the whole house daily. A few small habits can keep floors looking good.
Focus on busy spots first. Kitchens, entryways, and bathrooms usually need more attention than bedrooms.
- Sweep kitchen after cooking.
- Wipe spills right away.
- Shake doormats.
- Keep shoes near the door.
- Dry mop pet hair.
- Clean under the dining table.
- Keep a small cloth nearby.
| Busy area | Quick habit |
|---|---|
| Kitchen | Sweep crumbs |
| Doorway | Shake mat |
| Bathroom | Wipe wet spots |
| Dining area | Clean after meals |
| Pet area | Sweep hair |
| Living room | Dust mop |
Weekly Habits That Protect Floors
Weekly care helps floors stay fresh without harsh cleaning. It also gives you a chance to notice damage early.
Look at corners, under furniture, and near doors. These areas collect dirt quietly.
- Wash mop pads.
- Clean buckets.
- Vacuum edges.
- Wipe baseboards.
- Mop busy rooms.
- Check for sticky spots.
- Clean under mats.
| Weekly task | Why it matters |
|---|---|
| Wash mop pads | Stops smell |
| Clean bucket | Removes old grime |
| Check corners | Finds hidden dust |
| Mop kitchen | Removes grease |
| Clean mats | Stops dirt spreading |
| Look for damage | Fix small issues early |
A Practical Floor Cleaning Plan For Busy Homes
Busy homes need a simple plan. If the plan is too perfect, it will fail. The best plan is easy enough to repeat even on tired days.
Make the busy areas the main focus. A clean kitchen, entryway, and bathroom can make the whole home feel better.
Keep tools easy to reach. If the mop, cloth, and broom are hidden in a hard place, small messes will wait.
| Cleaning area | Quick plan |
|---|---|
| Kitchen | Sweep often, mop sticky spots |
| Entryway | Mat, shoe tray, quick sweep |
| Bathroom | Dry hair first, damp clean |
| Living room | Dust mop and spot clean |
| Bedrooms | Light weekly dust mop |
| Pet area | Clean bowls and hair often |
A Simple “Small Mess First” Rule
Do not wait for the whole floor to look bad. Clean small messes when they happen. This keeps dirt from spreading.
A two-minute wipe can save a thirty-minute mop later.
- Wipe spills right away.
- Sweep crumbs after eating.
- Clean shoe mud before it spreads.
- Dry wet bathroom spots.
- Spot clean sticky patches.
- Wash dirty cloths after use.
| Small mess | Fast action |
|---|---|
| Water drop | Dry cloth |
| Crumbs | Hand broom |
| Mud | Let dry, sweep, wipe |
| Grease spot | Mild soap cloth |
| Pet water spill | Towel |
| Juice | Damp cloth and rinse |
DIY Cleaner Storage And Safety
Homemade cleaners should be treated with care. Even mild cleaners should be labeled and stored safely. A plain bottle with no label can cause confusion.
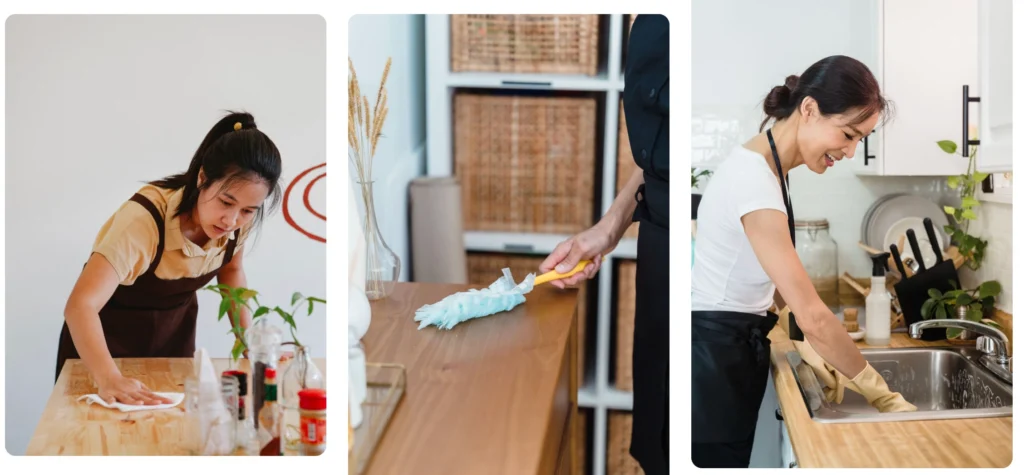
Make small batches when possible. Fresh cleaner is better than an old bottle sitting for weeks. If it smells odd or looks cloudy in a strange way, throw it out.
Never store DIY cleaner in food bottles. Someone could mistake it for a drink.
| Storage rule | Why it matters |
|---|---|
| Label every bottle | Stops confusion |
| Keep away from children | Prevents accidents |
| Make small batches | Fresher and simpler |
| Avoid food bottles | Reduces risk |
| Do not mix products | Safer cleaning |
| Store in cool place | Keeps it stable |
What To Put On A DIY Cleaner Label
A label does not need to be fancy. It only needs clear words.
Write what is inside and where it should be used. Also write what not to mix it with if needed.
- Name of cleaner.
- Ingredients.
- Floor type.
- Date made.
- Warning not to mix.
- Keep away from children and pets.
| Label part | Example |
|---|---|
| Name | Mild floor cleaner |
| Ingredients | Water and mild soap |
| Use | Tile and vinyl after testing |
| Date | Made today |
| Warning | Do not mix with bleach |
| Storage | Keep closed and out of reach |
What To Do If Your Floor Looks Worse After Mopping
Sometimes a floor looks worse after cleaning. This usually means residue, dirty water, poor drying, or the wrong cleaner.
Do not panic and do not add stronger cleaner right away. First, rinse the floor with clean water using a damp mop. Then dry it.
If the floor is stone or wood and looks damaged, stop using the cleaner and check proper care advice for that material.
| Problem after mopping | Likely cause |
|---|---|
| Sticky floor | Too much soap |
| Grey streaks | Dirty mop water |
| Dull surface | Wrong cleaner or buildup |
| White powder | Baking soda not rinsed |
| Water marks | Floor dried slowly |
| Raised edges | Too much moisture |
How To Fix Sticky Floors
Sticky floors are common after using too much soap. The answer is not more cleaner. The answer is usually clean water.
Mop again with plain warm water. Wring the mop well. Change water if it becomes cloudy.
- Use plain warm water.
- Mop with a clean pad.
- Rinse often.
- Dry the floor.
- Use less soap next time.
- Avoid adding scent oils.
| Sticky floor fix | Why it helps |
|---|---|
| Plain water rinse | Removes soap film |
| Clean mop pad | Stops spreading residue |
| Dry cloth | Removes leftover moisture |
| Less soap later | Prevents repeat problem |
| Fresh bucket | Avoids old grime |
How To Fix Cloudy Floors
Cloudy floors may come from residue, wrong products, or damage to the finish. Start with a gentle rinse. If that does not help, the floor may need special care.
Do not scrub hard on a cloudy floor unless you know the surface can take it.
- Stop using the current cleaner.
- Rinse with clean water.
- Dry fully.
- Check if the floor is stone, wood, or waxed.
- Avoid vinegar on delicate surfaces.
- Test future cleaners first.
| Cloudy floor cause | What to try |
|---|---|
| Soap film | Clean water rinse |
| Vinegar on stone | Stop acid cleaners |
| Old wax | Use proper floor care method |
| Dirty mop | Wash mop pad |
| Too much water | Dry faster |
| Wrong product | Switch to floor-safe cleaner |
A Helpful Home Test For Cleaner Amount
Most people use too much soap. A simple test can help you see it. Mop a small clean area with your usual mix, then wipe the dry floor with a damp white cloth.
If the cloth feels slippery or picks up soapy film, your mix is too strong. If the floor feels clean and smooth, your amount is probably better.
This is not a lab test. It is a practical home check. It helps you see what your feet may already feel.
| Test step | What to notice |
|---|---|
| Mop small area | Use your usual mix |
| Let dry | Wait until fully dry |
| Wipe with damp white cloth | Check for film |
| Touch floor | Feel for stickiness |
| Compare with plain water area | See which dries cleaner |
| Adjust soap | Use less if sticky |
What This Test Teaches
Floors often need less cleaner than people think. The mop, water quality, and drying matter as much as the recipe.
Once you find the right amount, write it down. That keeps you from guessing every time.
- Less soap often cleans better.
- Fresh water matters.
- A clean mop changes the result.
- Dry floors show the truth.
- Sticky feel means residue.
- Simple tests prevent repeated mistakes.
| If you notice | Change |
|---|---|
| Sticky feel | Use less soap |
| White film | Rinse better |
| Grey cloth | Sweep before mopping |
| Clean feel | Keep the same mix |
| Dull look | Check floor type |
| Strong smell | Use milder cleaner |
Smart Floor Cleaning Tips From Real Home Practice
The best floor tips are not always fancy. They are usually small habits that make cleaning easier.
A useful floor-care saying is this: “Do not mop dirt you can sweep.” Dry dirt is easier to remove before water touches it.
Another honest rule is: “If your mop smells bad, your floor will not smell clean.”
| Practical tip | Why it works |
|---|---|
| Sweep first | Stops muddy streaks |
| Use less soap | Prevents sticky floors |
| Change water early | Keeps floor cleaner |
| Dry edges | Protects seams and corners |
| Wash mop pads | Stops bad smell |
| Clean small messes fast | Saves deep cleaning |
Small Details That Make A Big Difference
Many people clean the middle of the floor and forget the edges. But edges hold dust, hair, and old spills. Clean corners sometimes by hand.
Also clean under mats. Dirt hides there and gets tracked back out.
- Lift mats and clean under them.
- Wipe corners with a cloth.
- Clean under table legs.
- Dry around doorways.
- Wash mop pads after bathroom use.
- Store tools where you can reach them.
| Forgotten spot | Why it matters |
|---|---|
| Under mats | Holds grit |
| Room corners | Collects dust |
| Around toilet base | Holds odor |
| Under pet bowls | Gets sticky |
| Door edges | Tracks dirt |
| Under chairs | Food crumbs hide |
When A DIY Cleaner Is Not Enough
DIY cleaners are good for normal dirt, light grease, and daily floor care. They are not the answer for every problem.
Some floor issues need special products or professional help. This includes damaged wood finish, deep stone stains, old wax buildup, water damage, mold, or strong odors from unsafe messes.
Knowing when to stop is part of good cleaning. Scrubbing harder can make damage worse.
| Problem | Better next step |
|---|---|
| Water-damaged wood | Get floor advice |
| Etched stone | Use stone professional care |
| Old wax buildup | Use correct wax removal method |
| Moldy smell | Find moisture source |
| Loose tiles | Repair before heavy cleaning |
| Deep pet urine odor | Use suitable odor treatment |
| Swollen laminate | Stop wet cleaning |
Signs You Should Not Keep Scrubbing
Scrubbing feels active, but it can be harmful. If the floor is changing texture, color, or shine, stop.
The goal is to clean the floor, not wear it down.
- Surface becomes dull.
- Color changes.
- Edges lift.
- Wood feels rough.
- Stone looks etched.
- Vinyl pattern fades.
- Laminate seams swell.
| Warning sign | Meaning |
|---|---|
| Dull patch grows | Cleaner or scrubbing may be damaging |
| Rough area appears | Surface may be worn |
| Water mark stays | Moisture may be entering |
| Seams lift | Too much water |
| Shine disappears | Finish may be affected |
| Pattern changes | Surface may be scratched |
FAQs About Natural DIY Floor Cleaner
What is the easiest natural DIY floor cleaner?
The easiest natural DIY floor cleaner is warm water with a few drops of mild liquid soap. It is simple, cheap, and gentle for many sealed floors.
Use a damp mop and avoid soaking the floor. Rinse if the floor feels sticky after drying.
| Ingredient | Purpose |
|---|---|
| Warm water | Loosens daily dirt |
| Mild soap | Removes light grease |
| Clean mop | Lifts dirt |
| Dry cloth | Removes extra moisture |
Can I use vinegar to clean all floors?
No, vinegar should not be used on all floors. It can be useful on some tile and vinyl floors, but it can damage stone and may dull some wood finishes.
Do not use vinegar on marble, limestone, travertine, natural stone, unsealed wood, or waxed floors.
| Use vinegar with care on | Avoid vinegar on |
|---|---|
| Some ceramic tile | Marble |
| Some porcelain tile | Limestone |
| Some vinyl | Travertine |
| Safe non-stone floors | Hardwood without approval |
| Light grease areas | Waxed floors |
Why does my floor feel sticky after mopping?
A sticky floor usually means too much soap or cleaner was used. It can also mean dirty water was spread across the floor.
Mop again with clean warm water and a clean mop pad. Next time, use fewer drops of soap.
| Sticky cause | Fix |
|---|---|
| Too much soap | Plain water rinse |
| Dirty mop | Wash mop pad |
| Dirty bucket water | Refill bucket |
| Floor not rinsed | Damp mop with clean water |
| Product buildup | Use less cleaner |
Is baking soda good for floor cleaning?
Baking soda can help with small spots and grout lines, but it is not the best for full-floor mopping. It can leave a powdery film if not rinsed well.
Use it as a paste for small areas only. Always test first.
| Baking soda works for | Baking soda is poor for |
|---|---|
| Small sticky spots | Whole floor cleaning |
| Some grout lines | Glossy delicate floors |
| Light scuffs | Unrinsed mopping |
| Corners | Stone without testing |
How often should I mop my floors?
Mop when the floor needs it. Busy kitchens and bathrooms may need mopping more often. Bedrooms and low-traffic rooms may need less.
Dry sweeping can be done more often than wet mopping. This keeps dirt from building up.
| Area | General habit |
|---|---|
| Kitchen | Sweep often, mop when sticky |
| Bathroom | Damp clean often |
| Entryway | Sweep often |
| Bedroom | Dust mop weekly |
| Living room | Spot clean and mop as needed |
Can I add essential oils to floor cleaner?
It is better to be careful. Essential oils can leave residue, make floors slippery, or bother pets and sensitive people.
If you want a fresh smell, clean the source of odor, wash the mop, and let fresh air into the room.
| Fresh smell method | Safer reason |
|---|---|
| Open window | Clears stale air |
| Wash mop pad | Removes old odor |
| Dry the floor | Prevents musty smell |
| Clean spills fast | Stops odor at source |
| Wash mats | Keeps entry fresh |
What is the safest cleaner for laminate floors?
The safest cleaner for laminate floors is usually a barely damp microfiber mop with warm water. If needed, add only a tiny amount of mild soap.
Do not flood laminate. Do not leave water sitting near seams.
| Laminate rule | Why |
|---|---|
| Use little water | Prevents swelling |
| Wring mop well | Protects seams |
| Dry quickly | Reduces marks |
| Avoid steam | Heat and moisture may harm |
| Use mild cleaner | Protects surface |
What is the safest cleaner for hardwood floors?
For sealed hardwood, use a dry mop often and a barely damp mop when needed. Plain warm water or a tiny amount of mild soap can help with light dirt.
Do not soak wood floors. Dry them quickly.
| Hardwood rule | Why |
|---|---|
| Dust first | Prevents scratches |
| Barely damp mop | Protects wood |
| Dry fast | Stops water marks |
| Avoid strong acid | Protects finish |
| Spot clean spills | Prevents stains |
Why does my floor look dull after using a DIY cleaner?
The floor may look dull because of soap residue, dirty water, vinegar damage, old wax buildup, or too much moisture.
Start by rinsing with clean water. If the floor is stone or wood and still looks dull, stop using that cleaner and check the proper care method.
| Dull floor cause | First action |
|---|---|
| Soap film | Rinse with clean water |
| Dirty water | Change bucket |
| Vinegar on stone | Stop acid use |
| Too much water | Dry faster |
| Old product buildup | Use proper floor care |
Can I make one DIY cleaner for every room?
You can make one mild soap and water cleaner for many sealed floors, but you should not use one cleaner blindly on every floor type.
Bathrooms, kitchens, stone floors, wood floors, and laminate floors all have different needs. Match the cleaner to the surface.
| Floor or room | Better approach |
|---|---|
| Kitchen | Mild soap for grease |
| Bathroom | Clean water and good drying |
| Stone | Neutral cleaner only |
| Wood | Barely damp mop |
| Laminate | Very little water |
| Tile | Mild cleaner and grout care |
What should I never mix when making a DIY floor cleaner?
Never mix bleach with vinegar, ammonia, or other cleaning products. This can create harmful fumes. Also avoid mixing many products just because they are in the cupboard.
Keep DIY cleaners simple and clearly labeled.
| Do not mix | Safer choice |
|---|---|
| Bleach and vinegar | Use one product only |
| Bleach and ammonia | Never combine |
| Many cleaners together | Use mild soap water |
| Random sprays | Follow labels |
| Unknown products | Do not mix |
How can I make floors cleaner without mopping more?
Stop dirt before it spreads. Use mats, remove shoes indoors, dry mop often, and wipe spills fast.
This keeps floors cleaner with less work.
| Habit | Result |
|---|---|
| Use doormats | Less outdoor dirt |
| Remove shoes | Less grit |
| Wipe spills fast | Fewer sticky spots |
| Dry mop often | Less wet cleaning |
| Clean pet areas | Less smell |
| Wash mop pads | Better results |
What is the best natural cleaner for bathroom floors?
For many bathroom tiles, warm water with a few drops of mild soap works well. If the floor is stone, avoid vinegar and use a stone-safe cleaner.
Clean hair and dust before wet mopping. Dry the floor after cleaning.
| Bathroom need | Cleaner or tool |
|---|---|
| Hair | Dry sweep first |
| Soap marks | Mild soap water |
| Odor | Clean mop and dry floor |
| Corners | Cloth by hand |
| Stone floor | Neutral cleaner |
| Tile grout | Soft brush |
How do I stop mop marks on shiny floors?
Use less cleaner, wring the mop well, and change water often. Shiny floors show residue more than dull floors.
A clean microfiber mop can help reduce marks.
| Mop mark cause | Fix |
|---|---|
| Too much soap | Use fewer drops |
| Dirty water | Change bucket |
| Wet mop | Wring better |
| Dirty pad | Wash pad |
| Slow drying | Let air move |
Is plain water enough to clean floors?
Plain water can be enough for light dust and daily freshening. It may not remove grease, sticky food, or bathroom film well.
For those messes, add a very small amount of mild soap.
| Plain water is good for | Needs mild soap |
|---|---|
| Light dust | Grease |
| Fresh footprints | Sticky spills |
| Quick wipe | Food marks |
| Low-traffic rooms | Kitchen floors |
| Sensitive floors | Bathroom film |
How do I make my DIY floor cleaner better without making it stronger?
Improve the method, not the strength. Sweep better, use a clean mop, change water more often, and dry the floor well.
Most floors need better habits more than stronger cleaner.
| Better method | Why it helps |
|---|---|
| Sweep first | Removes grit |
| Clean mop | Stops dirt spreading |
| Fresh water | Prevents streaks |
| Less soap | Reduces residue |
| Dry quickly | Prevents marks |
| Spot clean | Handles hard messes first |